11 · Output
Makera Carvera
Stage files, the tool rack, jobs, probing and leveling on Makera's Carvera machines.
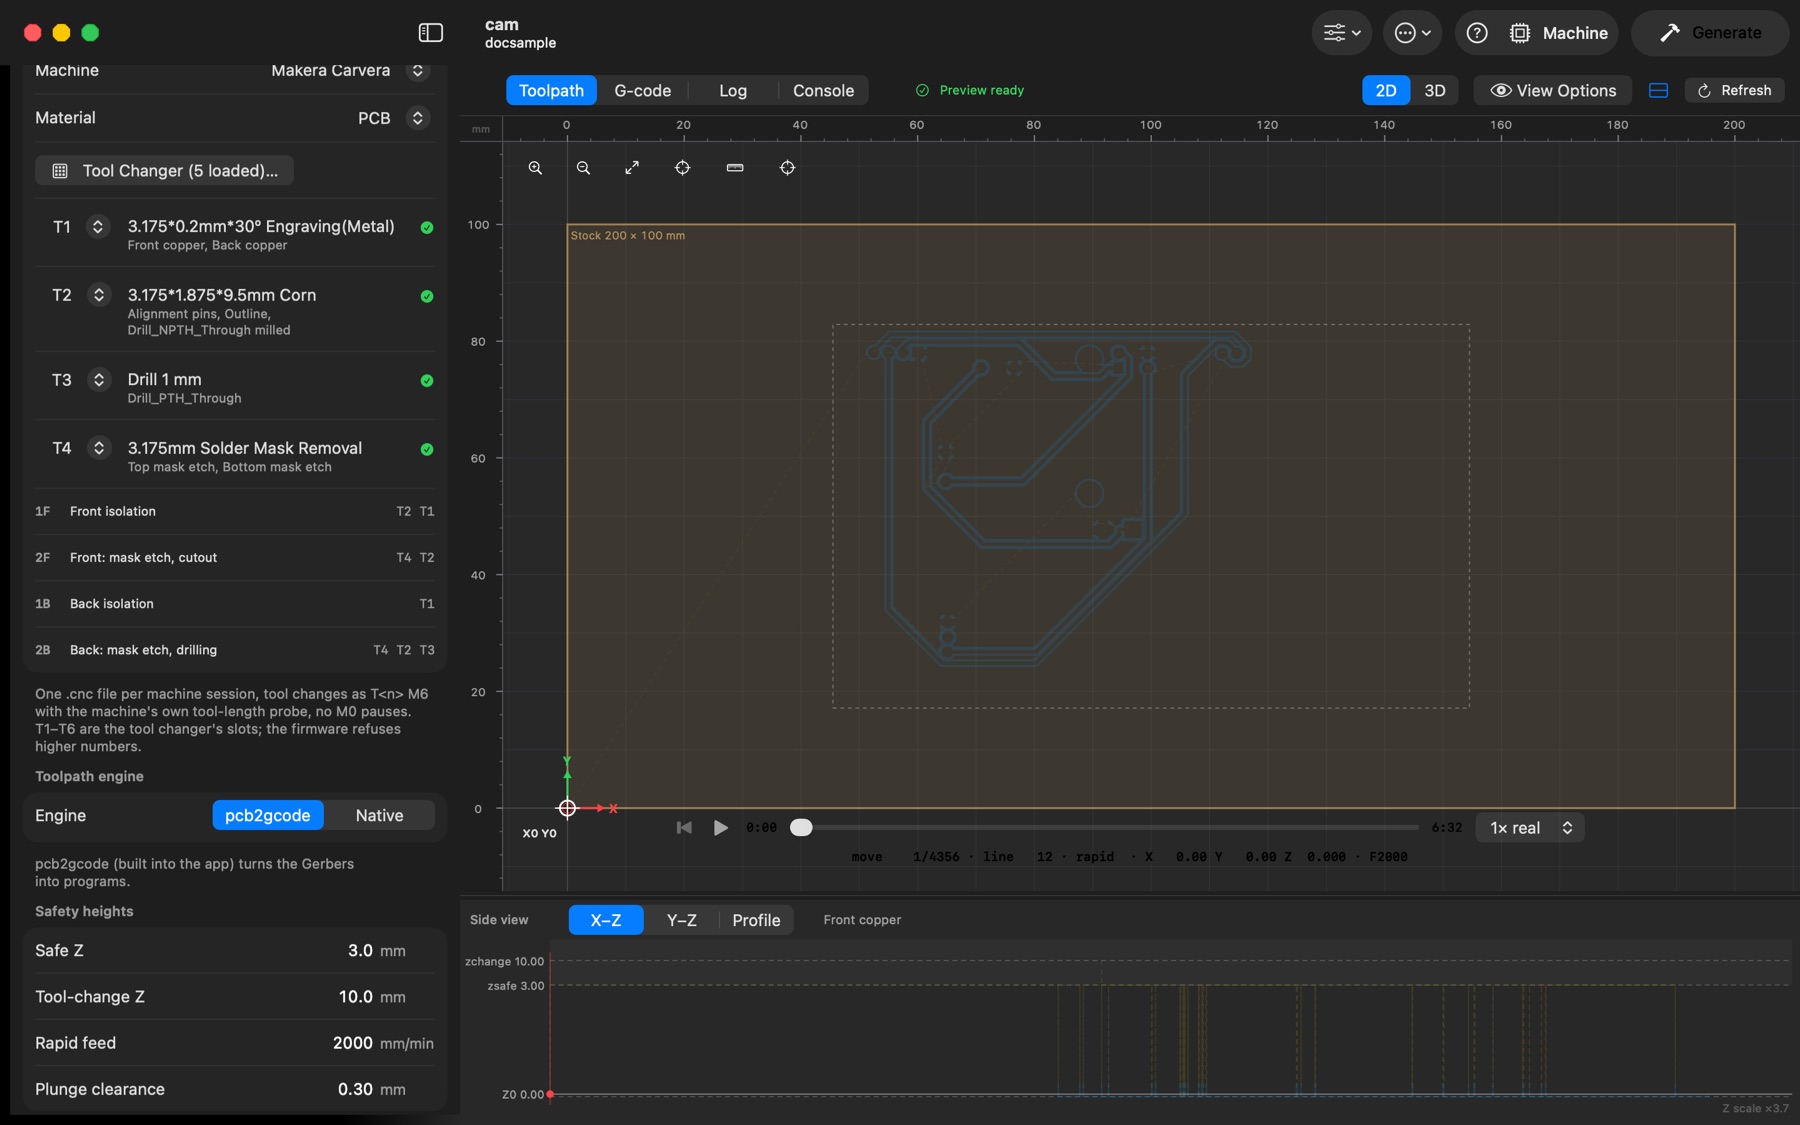
Machine setup → Machine picks the controller the programs are written for. Generic GRBL / FluidNC is the classic output described above. The Makera Carvera profiles (Carvera, Carvera with the community firmware, Carvera Air, Z1) write what that machine's Smoothieware-based firmware expects, and the Machine panel drives the machine itself — tool changes, probing, leveling and the job — so Makera's controller app is not needed. The Carvera differs from a GRBL machine in two ways that matter:
- No M0. Carvera's firmware does not implement
M0, so a GRBL-style program would run straight through a tool change with the old bit still in the spindle. In Carvera files every change isT<n> M6: the tool changer picks slot n from the rack and probes the bit's length on the tool setter (an Air or Z1 parks, asks for the bit and probes it). - One file per machine session instead of one per layer. A stage is everything that runs between two moments you must touch the board: 1F front isolation (and the alignment pins) · paint and cure the mask · 2F front mask etch, drilling, hole milling, cutout · flip · 1B back isolation · paint and cure · 2B back mask etch and anything drilled from the back. Stages with nothing in them are not written; a single-sided board gets 1F and 2F. Silkscreen and drawn layers join their side's second stage.
The rack
Every distinct bit of the project gets a slot: T1, T2… in the order the stages use them, the same number in every file. The list is shown under Machine setup → Machine — each slot with its bit, the layers that use it and a green check when the tool changer holds it — followed by the stages with the slots each one uses. Pick another number to fix a bit's slot; Number the rack automatically forgets the fixes. The rack is also written as comments at the top of every stage file and in the Log. The stock Carvera has six slots; the sidebar warns when a job needs more — combine drill sizes with the bits on hand, or pick the community-firmware profile, where T7 and above prompt for a manual change. T0 is never used: it is the wireless probe. Tool Changer… (see Tool library → The tool changer) records which bit sits in each slot; bits loaded there keep their slot in every job.
Stage files
<project>-1F-front-isolation.cnc, <project>-2F-front-mask-drill-cut.cnc and so on, in the Generate destination; the Generate dialog lists them with their slots and estimated times. Each starts with the rack, the stage's estimated time and what to do before it, then G90 G94 G17 G21 / G54. Nothing moves before the stage's first T<n> M6: the changer fetches the bit from the parked position, and after each change the spindle crosses at the changer's height, then starts, dwells, and only then descends — so no move ever drops from the parked spindle toward the board. Feeds above the machine's rapid speed and spindle speeds above its maximum are clamped; the file ends M5 / G28 (clearance position) / M2. Compressed air (M7) is on while cutting unless you switch it off in the Generate dialog, which can also keep the per-layer .ngc programs next to the stage files. Export program… writes a single program the same way. The preview, side view and time estimates still show the per-layer programs; the Machine panel's Program menu lists every stage, ready to send as one program.
Running a job on the Carvera
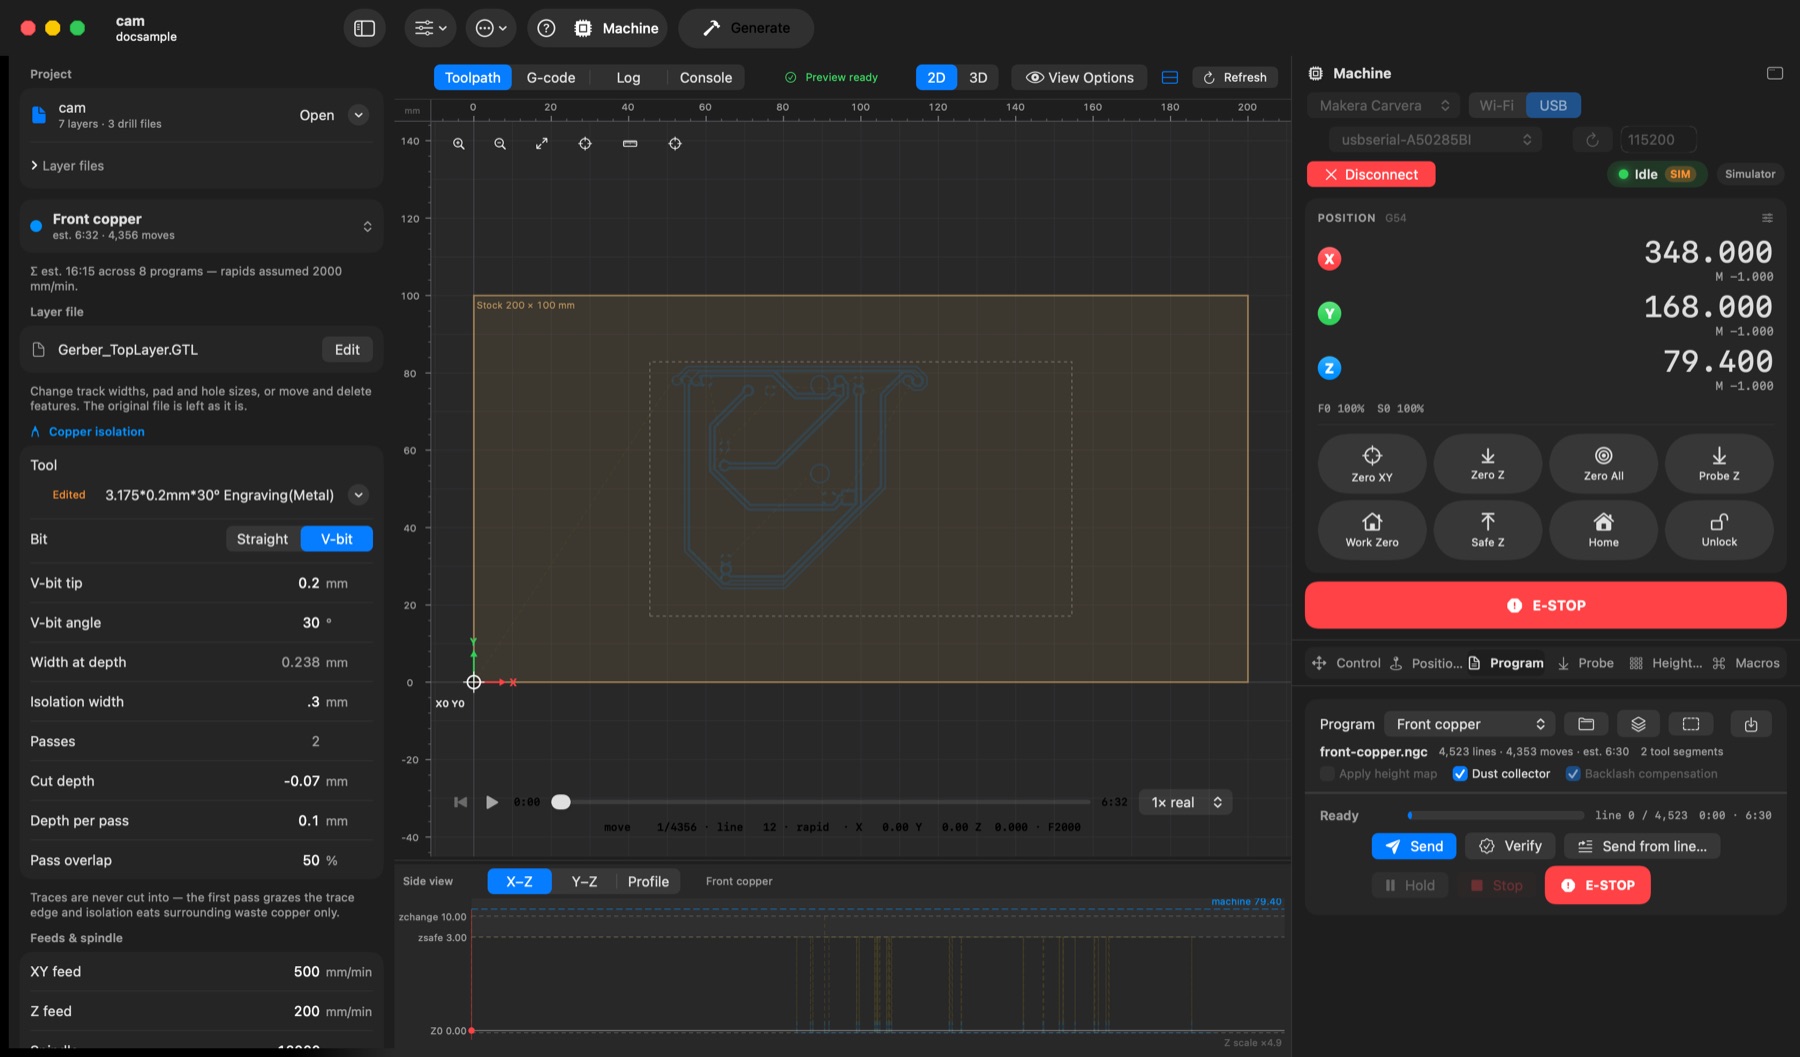
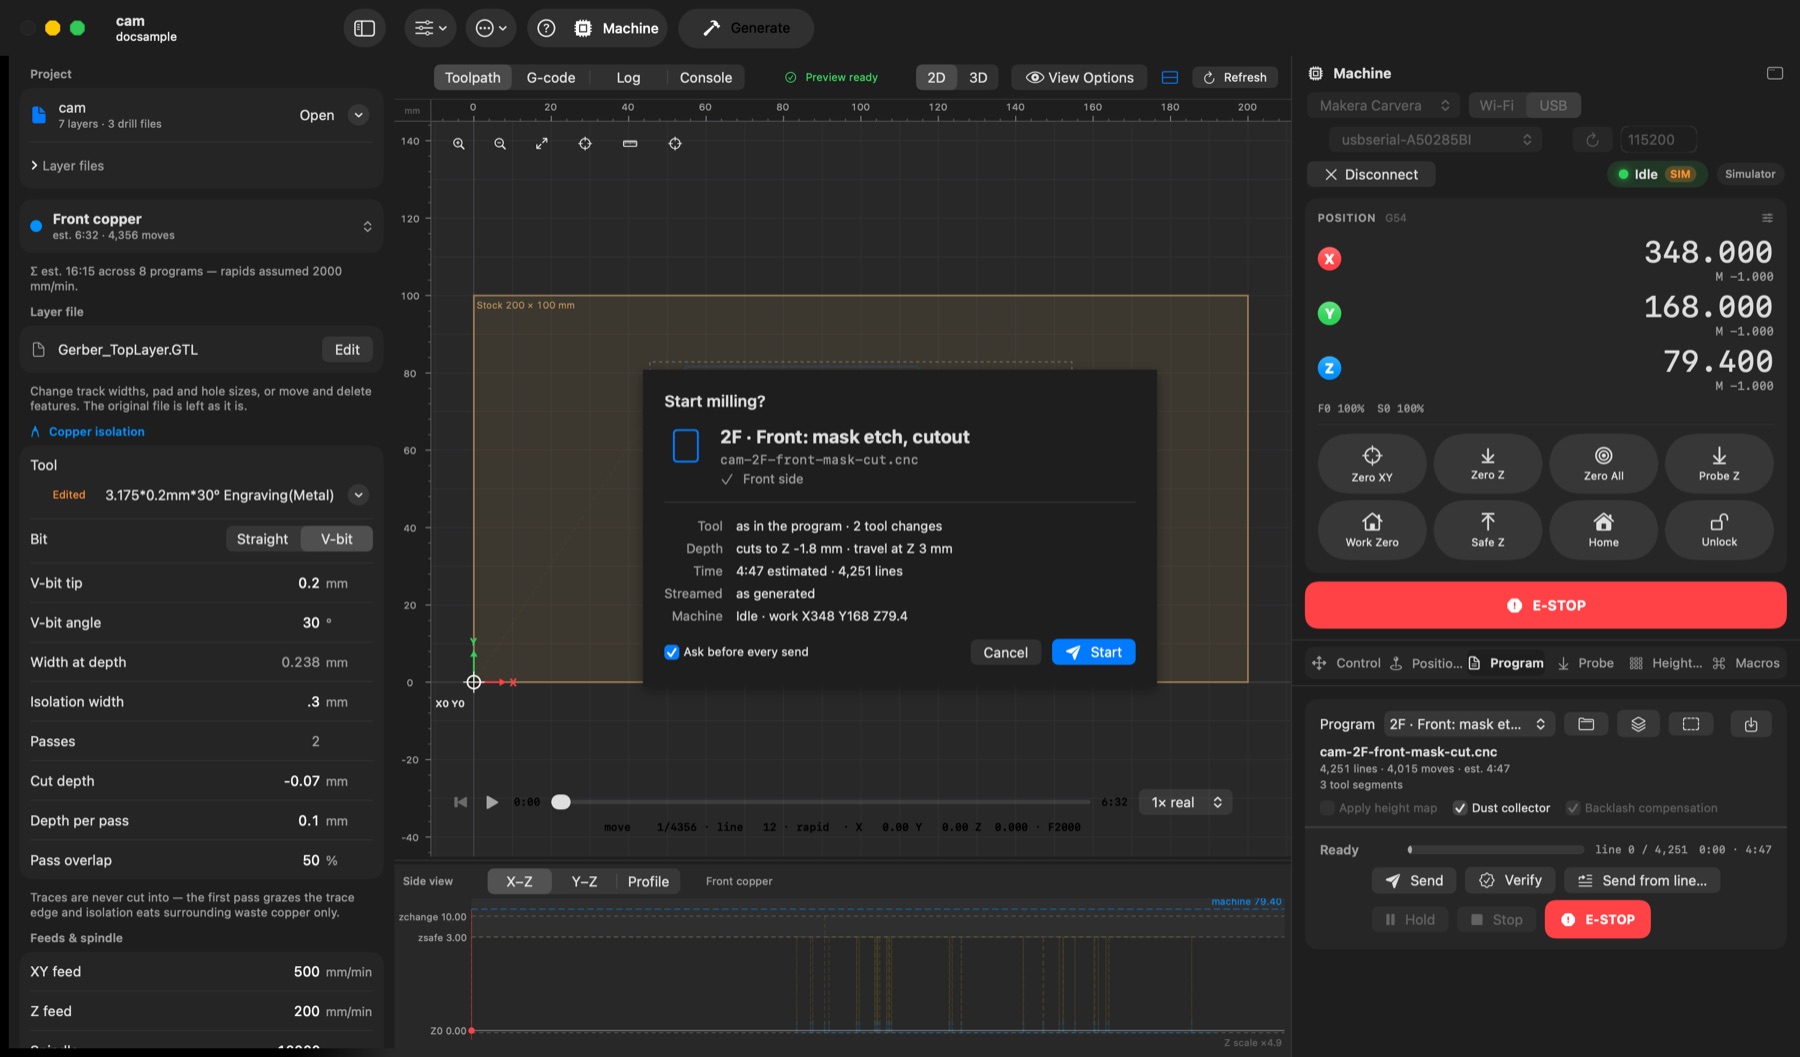
Connect from the Machine panel (Controller → Makera Carvera, Wi‑Fi or USB; see Machine panel → Connecting). A program is not streamed line by line as on GRBL: Send uploads it to the Carvera's SD card — with Makera's framed transfer on the stock firmware, XMODEM on the community firmware — and the machine plays it from there, so a Wi‑Fi hiccup cannot stall a cut. Home the machine first: the Carvera only plays a file once every axis is homed.
- What to send — one layer from the Program tab, or a whole stage: Send Stage to Machine… (sidebar) or Send Layers… (Program tab) ticks a stage — mask etch, drills, milled holes, cutout — or any set of layers, and they go out as one program in machining order, a
T<n> M6between them, with the slots of the job's rack; the chooser shows the slots and the estimated time, and warns when the ticked layers span two sessions (nothing would stop for painting the mask or flipping the board). - While it runs — progress, elapsed and remaining time come from the machine's own report; the canvases, side view, 3D view and G-code tab follow the job. Hold and Resume pause and continue the file on the machine, Stop aborts it. Tool changes run inside the file; the app shows Tool while the changer works.
- Dust collector (Program tab) — the uploaded file switches the Carvera's dust collector on at the start (
M801) and off at the end (M802); a stopped or failed job switches it off too. - Send from line… is not available on a Carvera: it plays the whole uploaded file.
- An interrupted tool change — if the machine halts in the middle of a tool change (E-STOP, an alarm, a reset), it may no longer know what is in the collet, and a later change could plunge into the rack. The app then locks Send and tool changes: home, hold the bit, open the collet (Tool menu → Unclamp Collet), take the bit out and press Spindle is empty beside the Tool menu. Only then is anything sent again.
Probing and leveling on the Carvera
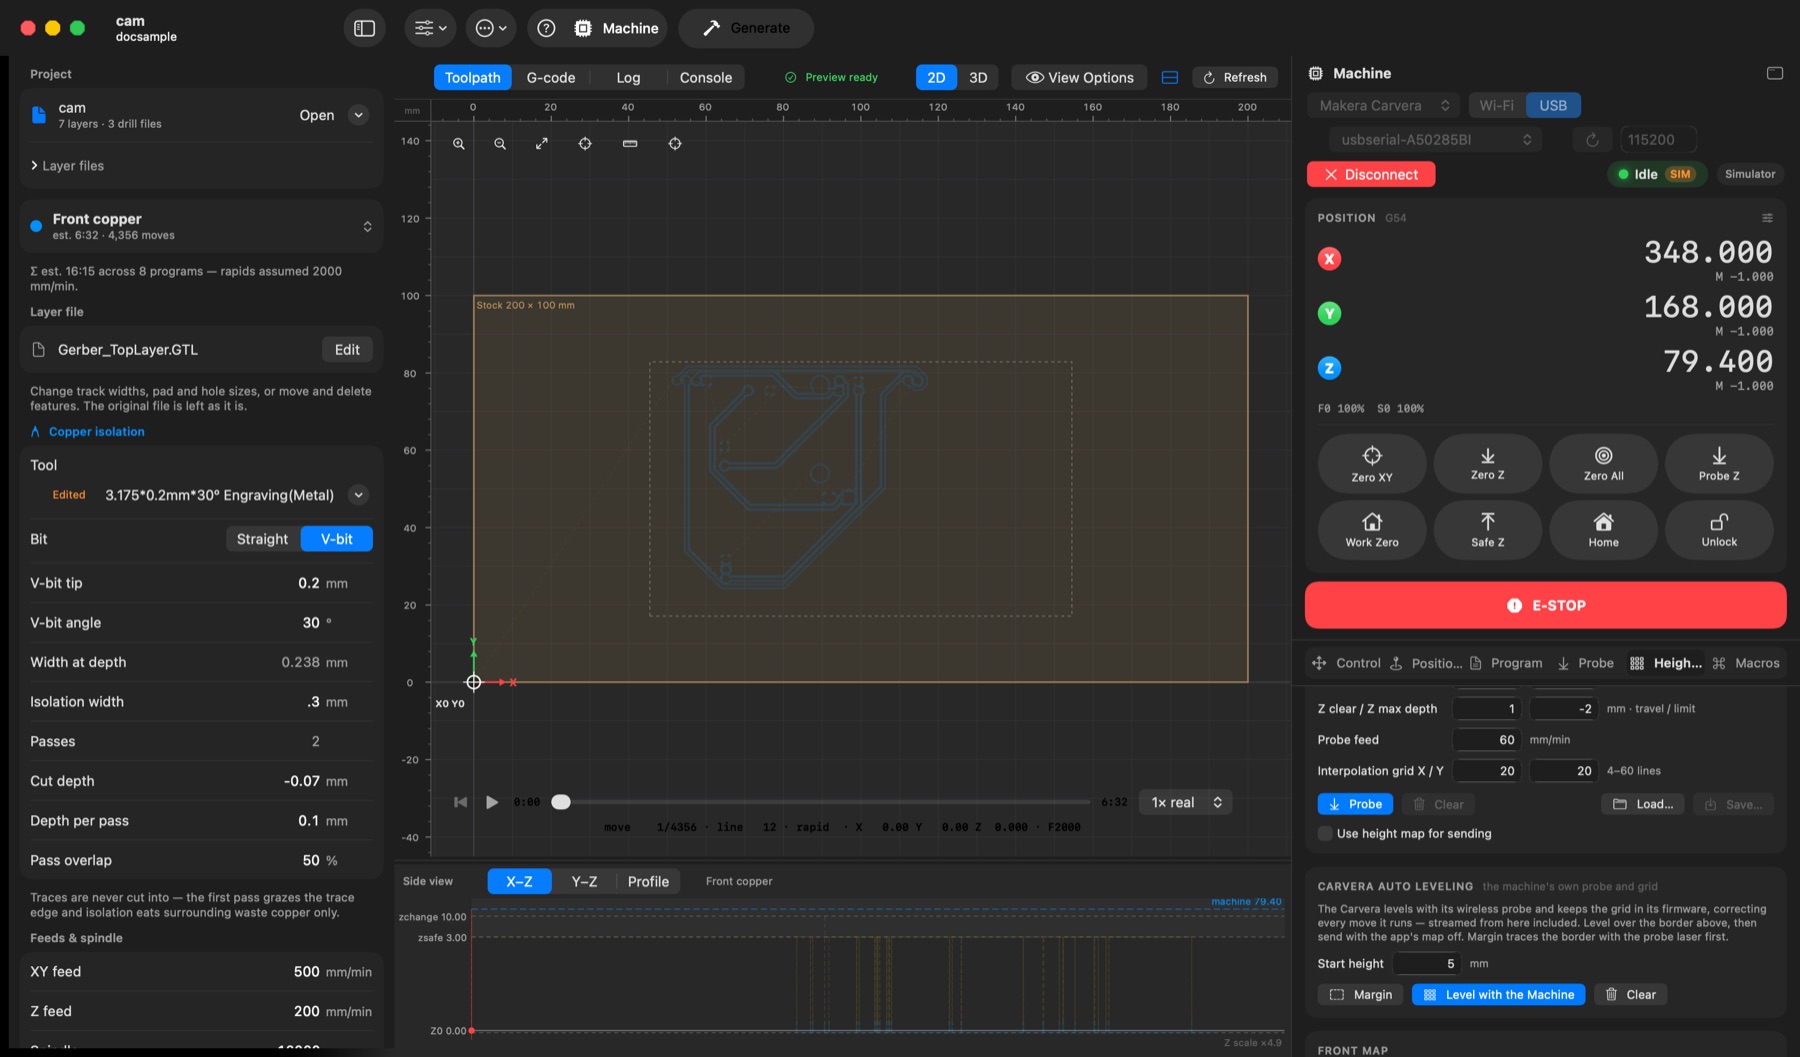
The Carvera's own routines, the ones Makera's controller wraps, are in the Machine panel; the tool changer fetches the wireless probe (T0) by itself for each of them.
- Probe with the Carvera (Probe tab) — position the spindle over the board; the machine fetches the probe, touches the surface twice and sets work Z0 there.
- Margin (Height Map tab and Program tab) — walks the border of the grid, or of the program, with the probe laser, so you see where the job lands before anything cuts.
- Level with the Machine (Height Map tab) — probes the grid with the wireless probe and keeps it in the firmware, which then corrects every move it runs. Clear (
M370) forgets the machine's grid. - The app's own height map works on the Carvera too: Probe on the Height Map tab fetches the probe and measures the grid, and Use height map for sending warps the uploaded copy. The app then clears the Carvera's own grid first (
M370), before probing and at the start of a file sent with the app's map, so the two corrections never add up. - Probe the whole board (Height Map tab) makes Auto cover the whole board, 1 mm inside its edges, instead of the area the selected program cuts — one map for every program of that side.
- Every probing run climbs to the travel height first, crosses to the first point up there and only then descends — never down where the probe stands and across.
- The changer measures every bit on the tool setter, so a Z0 set with the probe holds for every bit that follows; the Tool reference of the Probe tab is not needed on a Carvera.
Step by step: a double-sided board
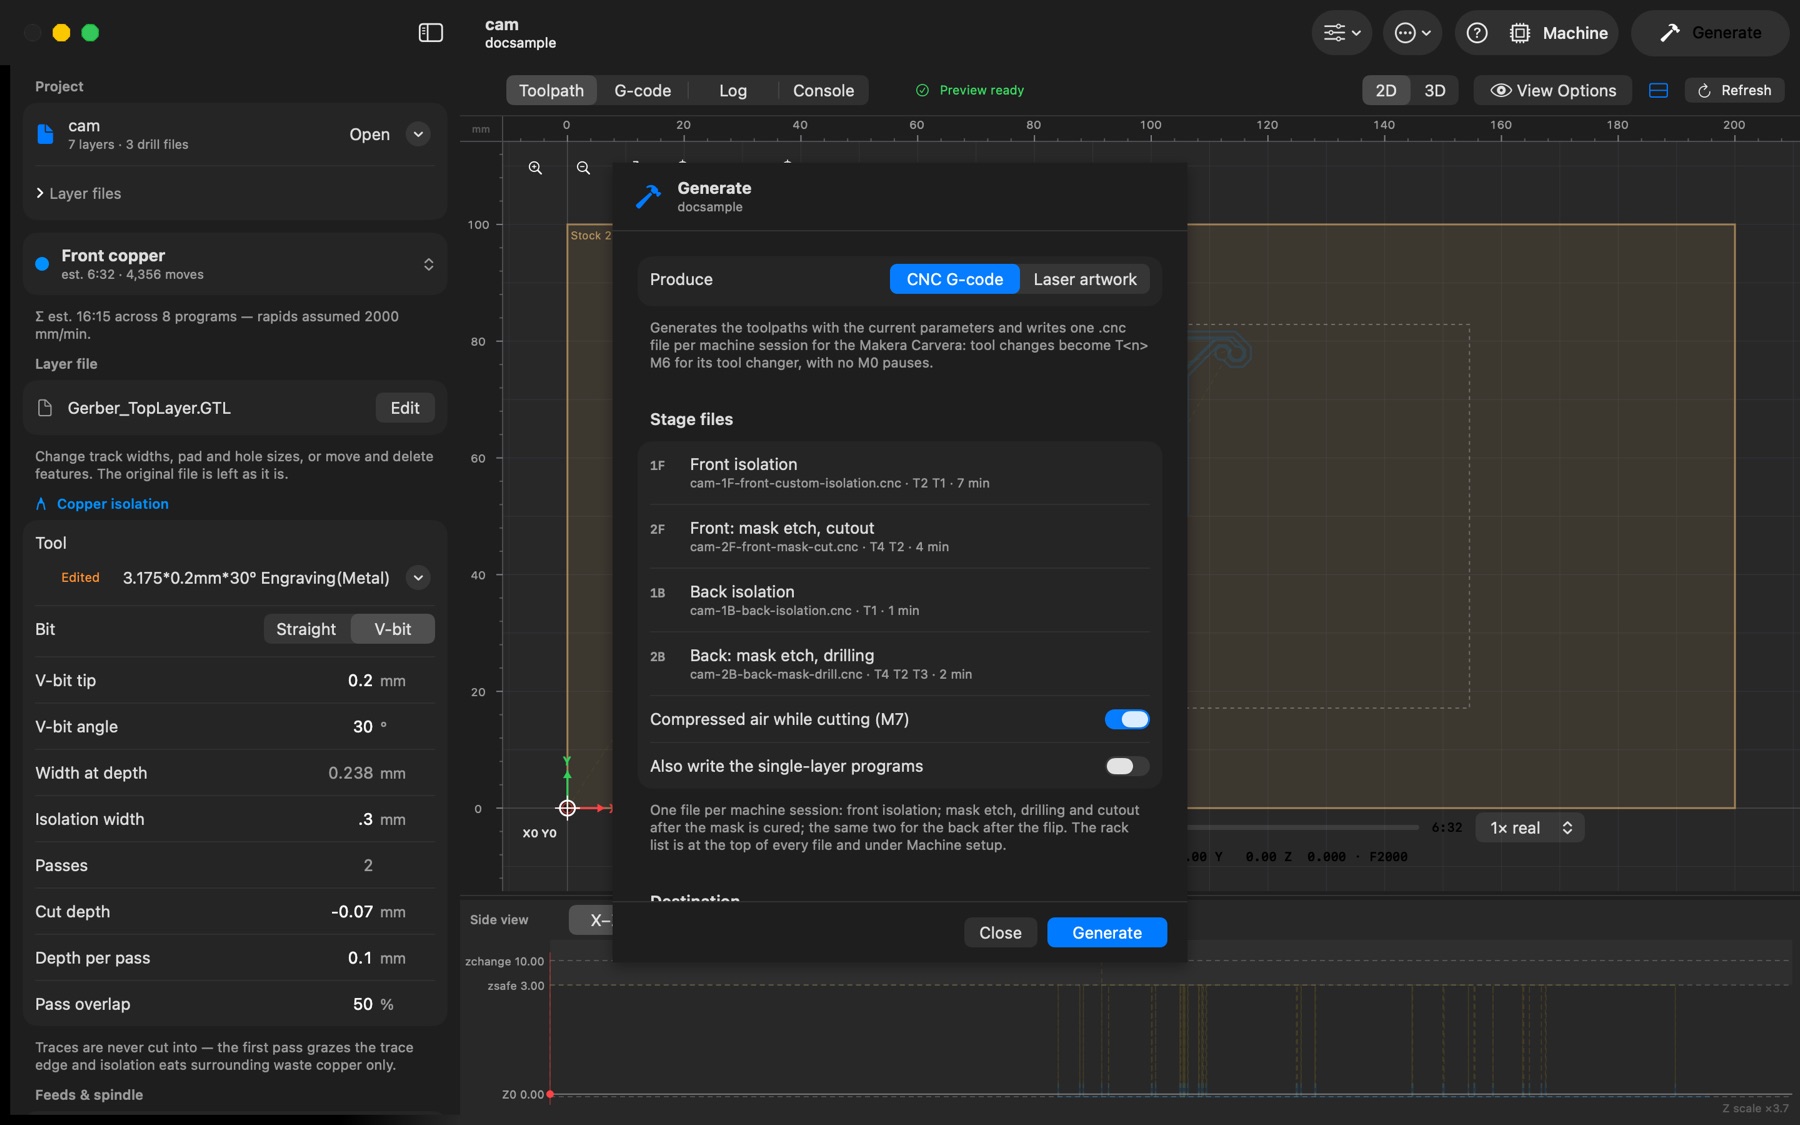
- Machine setup — Machine: your Carvera model; Material: PCB (the feeds of Makera's bits follow); Stock: the blank's size and thickness, Alignment pins: 2 (or 4). Pick the bits for each layer, then Tool Changer… → load the bits and Load This Job's Rack.
- Generate — or send each stage from the Machine panel.
- 1F — clamp the blank against Anchor 1, home, zero X/Y on the stock corner and Z with Probe with the Carvera; level with the machine or probe the app's map; send stage 1F: the alignment pin holes, then the front isolation.
- Paint and cure the solder mask without unclamping.
- 2F — send stage 2F: mask etch, drilling, hole milling, cutout. Leveling from 1F is reused; do not re-probe the painted board.
- Flip the blank over the pins as Machine setup → Board flips says — nothing is re-zeroed — then 1B, paint and cure, 2B.